Supplies needed:
cereal box
cutting mat (or craft work surface)
scissors
pencil
Sharpie marker
ruler
Xacto knife
glue stick or tape
hot glue gun
paper (decorative and plain white printer papers)
Optional:
cutting wheel
clear acetate for the "glass" window
acrylic paint
wood dollhouse flooring
First, start with an empty cereal box. Pay attention that the box is tall enough for the dolls you plan to use it for. Make a cut along one side of the box and along the bottom so that the box will open up. Also, cut off the top closing tabs.
Next, cut out the window(s). Measure how large you want it to be. Cut carefully with scissors or an Xacto knife (I happen to have a small cutting wheel handy, so used it instead).
For the "glass" window, I used an empty Barbie doll box that had a lot of clear plastic. You can also use this plastic to make dishes and things out of. I have a tutorial on how to make a cake stand of it which I will be posting later.
In order to get a good fit on the plastic, I layed it down over the window opening and then marked about 1/4 inch outside of the window area with a Sharpie marker to ensure it was wide enough. Then, I used a hot glue gun to fasten it securely to the wall.
Once you have these steps done, it's time to add the wallpaper and flooring. I used tissue paper for my walls, but you could use construction paper, scrapbook paper, and even acrylic paints if you wanted. I used a glue stick to glue down the tissue paper here and then carefully cut out the area for the window using scissors.
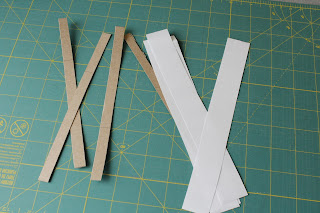
Next, cut out strips of paper to wrap around pieces of scrap cardboard left over from the cereal box to create the window frame/sills. Glue the paper to the cardboard using a glue stick. Basically, I glued the paper, then placed the cardboard piece on top of it, then folded the paper around it. You could also use this method to create some baseboard trim for the edge where the floor meets the wall.
Here's the final look:
I bought some scrapbook paper to use for the flooring, but actually had a nice dollhouse wood floor to use, so I chose that instead. I also added the white framing inside the window with plain computer printing paper cut into thin strips and taped those down BEFORE I added the window trim. All in all, this took me about 2 hours to complete. But, it's super inexpensive and would be a great project to do with friends and, when you need to put the playset away, just take the items out, fold the wall in and it collapses back to the regular cereal box size!


No comments:
Post a Comment